Create a contract and web app that mints NFTs
This tutorial covers how to set up a decentralized web application (dApp) that allows users to create NFTs on Tezos. No prior knowledge of NFTs or Tezos is required, but because the tutorial application uses TypeScript, some familiarity with JavaScript or TypeScript makes it easier to understand.
In this tutorial, you will learn:
- What NFTs are
- How to set up distributed storage for NFT metadata
- How to deploy (originate) a smart contract to Tezos
- How to use the Taquito JavaScript/TypeScript SDK to access Tezos and user wallets and to send transactions to Tezos
What is a non-fungible token (NFT)?
An NFT is a special type of blockchain token that represents something unique. Fungible tokens such as XTZ and real-world currencies like dollars and euros are interchangeable; each one is the same as every other. By contrast, each NFT is unique and not interchangeable. NFTs can represent ownership over digital or physical assets like virtual collectibles or unique artwork, or anything that you want them to represent.
Like other types of Tezos tokens, a collection of NFTs is managed by a smart contract. The smart contract defines what information is in each token and how the tokens behave, such as what happens when a user transfers an NFT to another user. It also keeps a ledger that records which account owns each NFT.
In this tutorial, you create NFTs that comply with the FA2 standard (formally known as the TZIP-12 standard), the current standard for tokens on Tezos. The FA2 standard creates a framework for how tokens behave on Tezos, including fungible, non-fungible, and other types of tokens. It provides a standard API to transfer tokens, check token balances, manage operators (addresses that are permitted to transfer tokens on behalf of the token owner), and manage token metadata.
Tutorial application
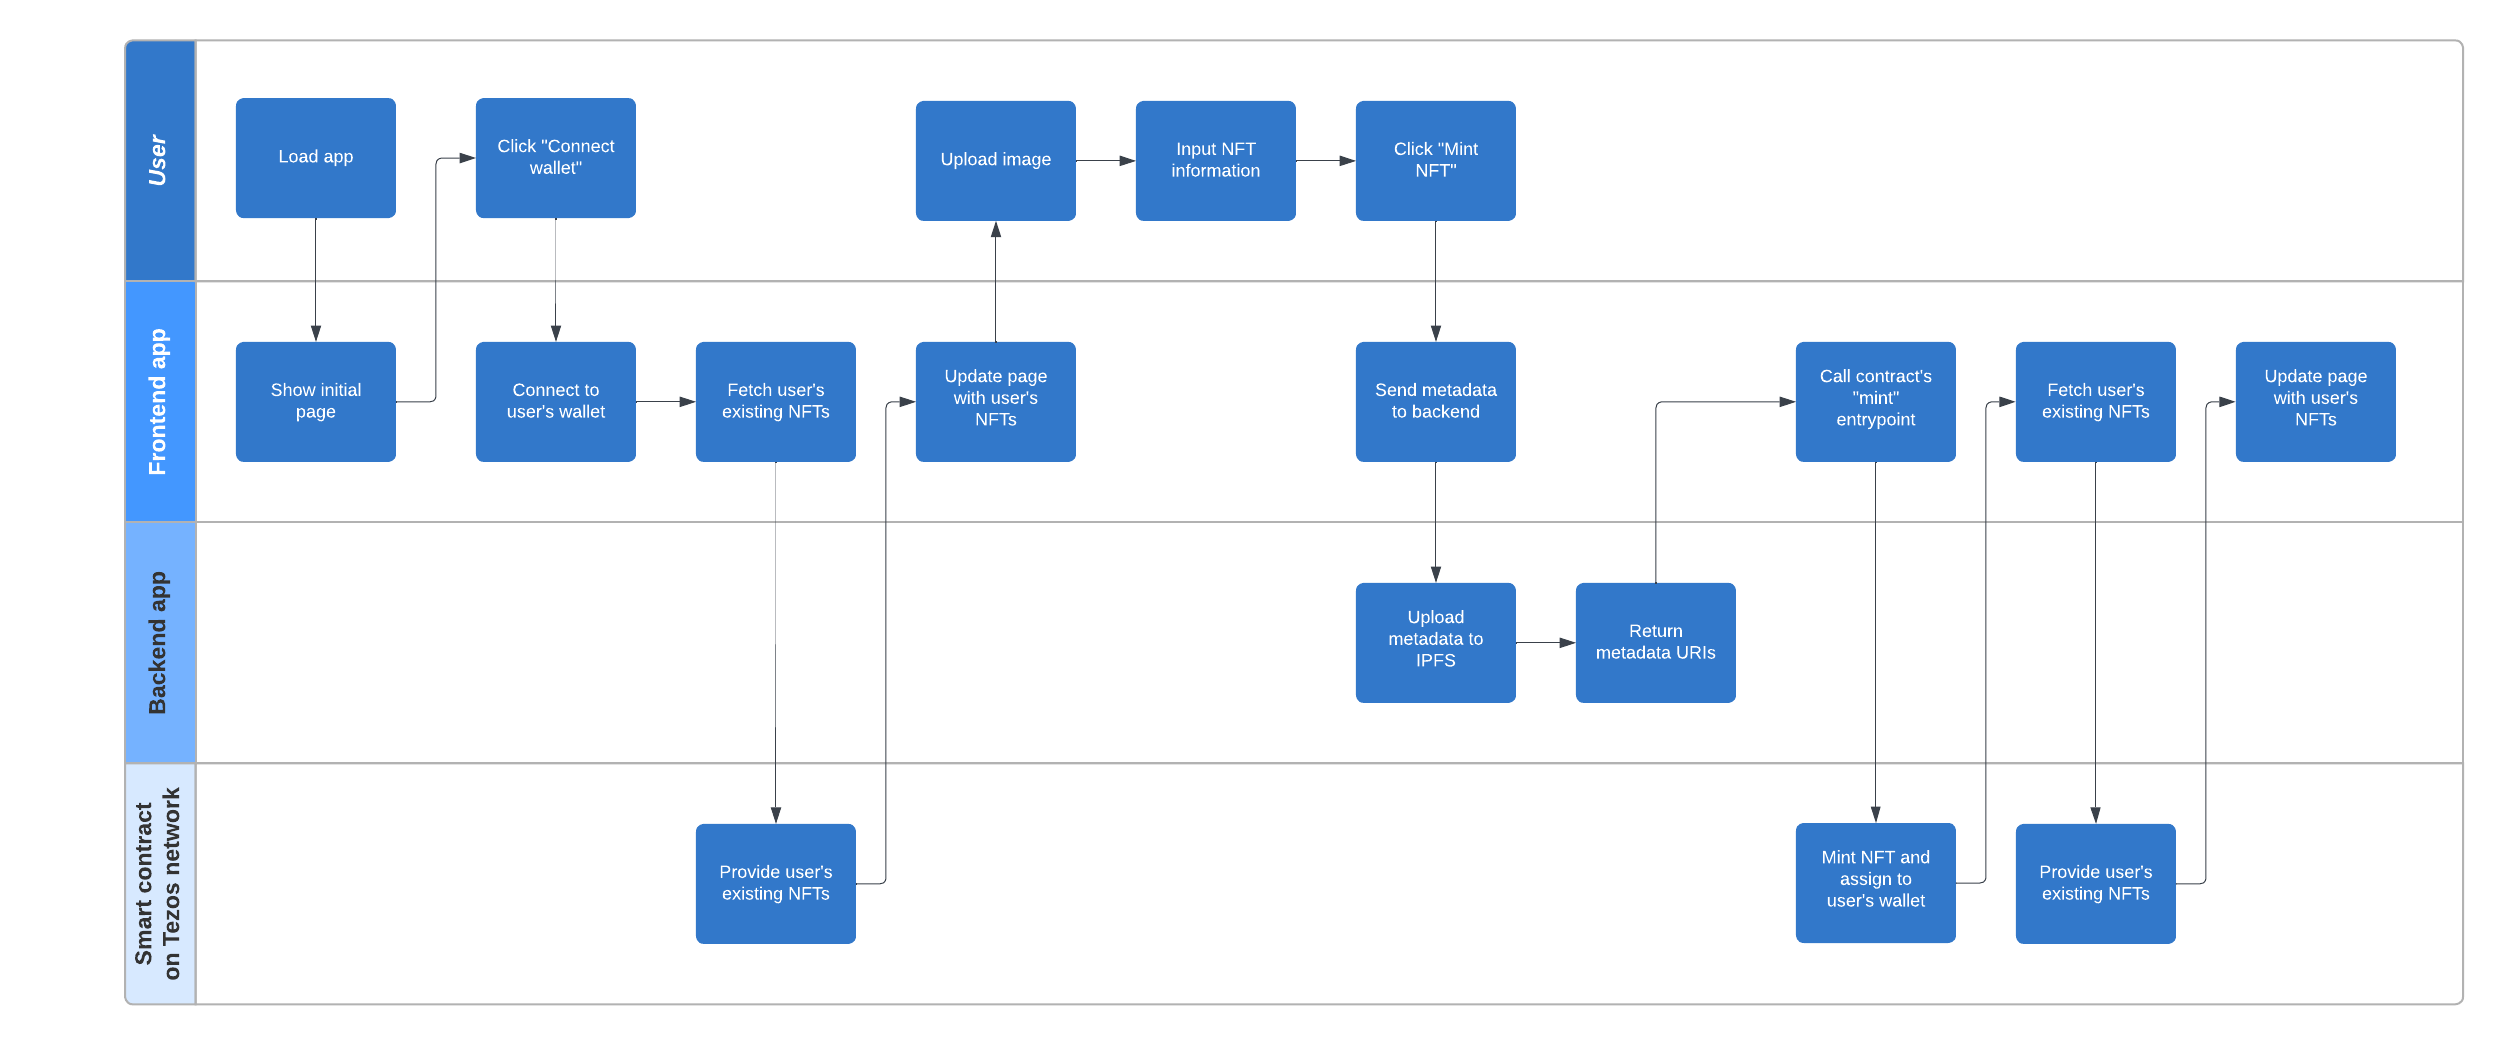
The application that you set up in this tutorial has three parts:
- The smart contract runs on the Tezos blockchain to manage the NFTs, including creating, transferring, and destroying them
- The backend application runs on a web server to upload the NFT data to the internet
- The frontend application runs on a web server and allows the user to connect their wallet, enter the information for the NFT, and send a request to the smart contract to create the NFT
This diagram shows what happens when the user creates an NFT with the application. The rest of this tutorial covers these steps in detail:
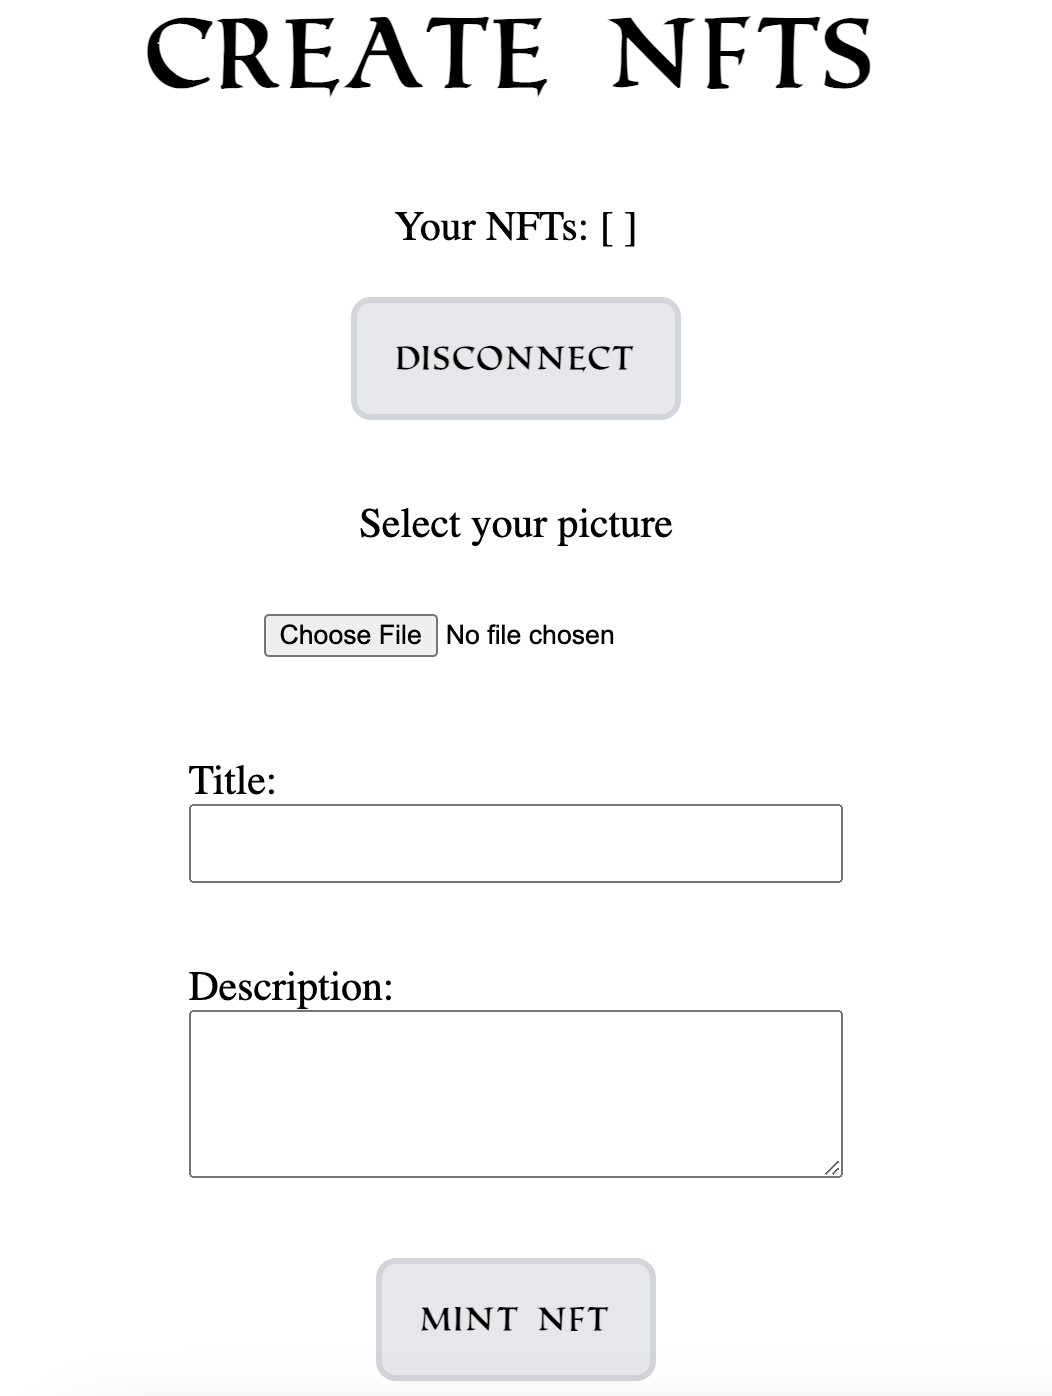
The frontend application looks like this, with fields for the image to represent the NFT and for its metadata:
Prerequisites
To run this tutorial you need Node.JS and NPM installed. See https://nodejs.org/. You can verify that they are installed by running these commands:
node --version
npm --version
Configure IPFS storage
NFTs have metadata, usually including at least a title and description. Optionally, the NFT can include many other metadata fields, such as links to media and attributes in many different formats.
Because storage space on blockchains is expensive, developers don't put entire token metadata files on Tezos. Instead, they configure decentralized storage for the NFT data and put only the link to that data on Tezos itself. In this section, you set up storage for the NFT metadata using the InterPlanetary File System (IPFS) protocol.
IPFS requires authentication just like blockchain transactions, so in this section you set up an account with the Pinata IPFS provider and use it to upload (or pin) the NFT data to IPFS.
-
Create a free Pinata account at https://app.pinata.cloud/developers/api-keys.
-
Go to the API Keys tab and click New Key.
-
On the Create New API Key page, expand API Endpoint Access > Pinning and enable the
pinFileToIPFSandpinJSONToIPFSpermissions, as in this picture: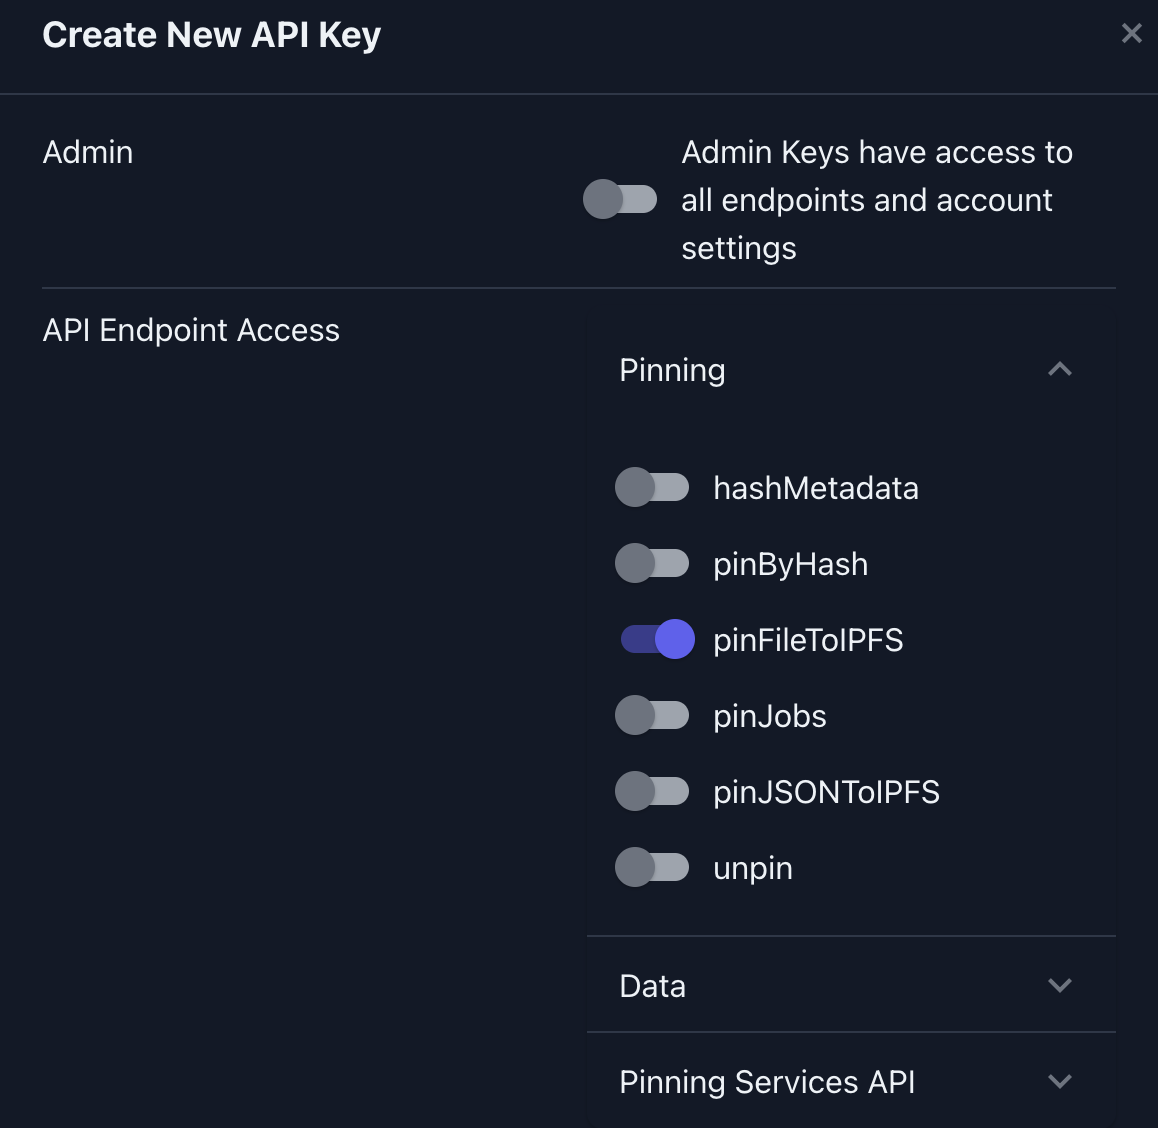
-
In the Key Name field, give the key a name, such as "My Key."
-
Click Create Key.
The API Key Info window shows the API key and secret, which you must copy immediately, because they are not shown again.
-
Copy the API Key and API Secret fields and save the values on your computer. You need these values in the next section.
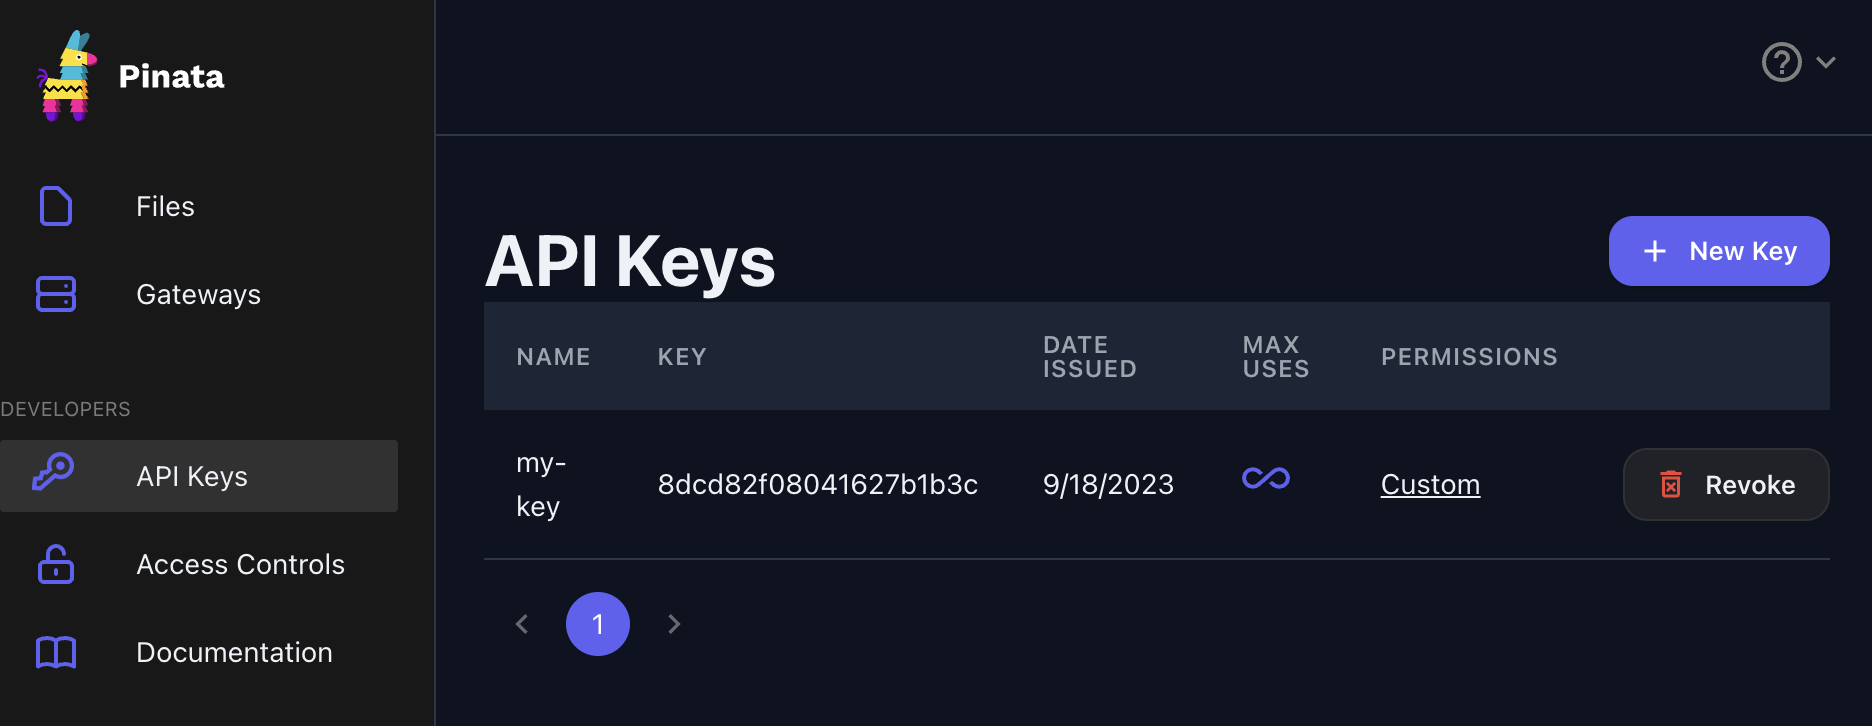
You can see the new API key on the API Keys tab:
Now your applications can use your Pinata account to pin NFT data to IPFS.
Download the tutorial files
The tutorial application has three parts:
- The smart contract that manages the NFTs
- The backend application that handles uploading data to IPFS
- The frontend application that connects to the user's wallet, sends the data to the backend application, and sends the transactions to the smart contract to mint the NFTs
The tutorial application files are in this GiHub repository: https://github.com/trilitech/tutorial-applications/tree/main/nft-taquito.
If you have the git program installed, you can clone the repository with this command:
git clone https://github.com/trilitech/tutorial-applications.git
If you don't have git installed, go to https://github.com/trilitech/tutorial-applications/tree/main/nft-taquito> and click "Code Download ZIP" and extra the ZIP file on your computer.
Then, go to the application in the nft-taquito folder.
The tutorial contract
The file contract/NFTS_contract.mligo contains the code for the smart contract that manages the NFTs.
This contract is written in the CameLIGO version of the LIGO smart contract programming language, with a syntax similar to OCaml.
This contract is already written for you, so do not need any experience with these languages to run the tutorial.
This contract creates NFTs that comply with the FA2 standard (formally known as the TZIP-12 standard), the current standard for tokens on Tezos. The FA2 standard creates a framework for how tokens behave on Tezos, including fungible, non-fungible, and other types of tokens. It provides a standard API to transfer tokens, check token balances, manage operators (addresses that are permitted to transfer tokens on behalf of the token owner), and manage token metadata.
The full details of the smart contract are beyond the scope of this tutorial, but the major parts of the contract have descriptions in comments.
Contract entrypoints
Like APIs, smart contracts have entrypoints, which are commands that transaction senders (client applications such as your web app or other contracts) can call. To comply with the TZIP-12 standard, the smart contract must have these entrypoints:
transfer: Transfers tokens from one account to anotherbalance_of: Provides information about the tokens that an account ownsupdate_operators: Changes the accounts that can transfer tokens
This contract includes these additional entrypoints:
mint: Creates NFTsburn: Destroys NFTs
Contract types
Because Tezos uses strongly-typed languages, this contract's code starts by defining the types that the contract uses. These types are important for verifying that data is in the correct format, such as the parameters the transaction senders pass.
For example, the transfer entrypoint accepts a list of the transfer type.
This type includes the account to transfer tokens from and a list of the transfer_destination type, which includes the account to transfer tokens to, the ID of the token to transfer, and the amount to transfer:
type token_id = nat

type transfer_destination =
[@layout:comb]
{
  to_ : address;
  token_id : token_id;
  amount : nat;
}

type transfer =
[@layout:comb]
{
  from_ : address;
  txs : transfer_destination list;
}
Error messages
The contract defines a series of error messages, and comments in the code describe what each error message means.
For example, the balance_of and transfer entrypoints return this error if the client requests information about a token that does not exist or tries to transfer a token that does not exist:
(** One of the specified `token_id`s is not defined within the FA2 contract *)
let fa2_token_undefined = "FA2_TOKEN_UNDEFINED"
Internal functions
The contract has many internal functions, such as this function, which gets the specified account's balance of tokens. In the case of NFTs, only one of each token exists, so the function returns a balance of 1 if the account owns the token and 0 if it does not.
(**
Retrieve the balances for the specified tokens and owners
@return callback operation
*)
let get_balance (p, ledger : balance_of_param * ledger) : operation =
  let to_balance = fun (r : balance_of_request) ->
    let owner = Big_map.find_opt r.token_id ledger in
    match owner with
    | None -> (failwith fa2_token_undefined : balance_of_response)
    | Some o ->
      let bal = if o = r.owner then 1n else 0n in
      { request = r; balance = bal; }
  in
  let responses = List.map to_balance p.requests in
  Tezos.transaction responses 0mutez p.callback
Entrypoint functions
Each entrypoint in the contract is a function with the @entry annotation.
For example, the mint entrypoint calls an internal function to handle minting tokens based on the parameters that are defined in the mint_params type:
(** Mint NFT entrypoint *)
[@entry]
let mint (p : mint_params) (storage : nft_token_storage) : return_value =
    ([]: operation list), mint (p, storage)
Initial storage state
An FA2 contract usually contains these properties in its storage:
- A table named
ledgerthat records the token IDs and the address of the current owner - A table named
metadatathat records the metadata associated with the contract itself, such as its name, creator, and what standards it meets - A table named
token_metadatathat records the metadata associated with every token stored in the contract
In this case, the contract uses the CameLIGO bigmap type for these tables.
This contract's storage includes other properties, including the list of operators and the next token ID.
When you originate (deploy) the contract to Tezos, you must set the initial state of its storage. For this contract, the initial storage state is in the comment at the end of the file.
Originate (deploy) the smart contract to the testnet
There are many ways to originate a contract on Tezos. For a tutorial on using the command line, see Deploy a smart contract.
Before you originate your contract to the main Tezos network (referred to as Mainnet), you can originate it to a testnet. Testnets are useful for testing Tezos operations because testnets provide tokens for free so you can work with Tezos without spending real tokens.
This tutorial uses the online LIGO IDE at https://ide.ligolang.org/ because you don't have to install any tools to use it.
Follow these steps to originate the smart contract to Tezos:
-
In a web browser, open the IDE at https://ide.ligolang.org/.
-
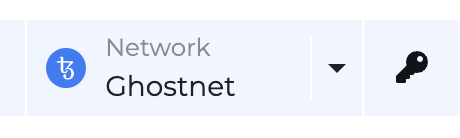
At the top right, click the Network drop-down list and next to Tezos, select the Ghostnet testnet. The network changes to the Ghostnet testnet, as in this picture:
-
Create an account to use to originate the contract:
-
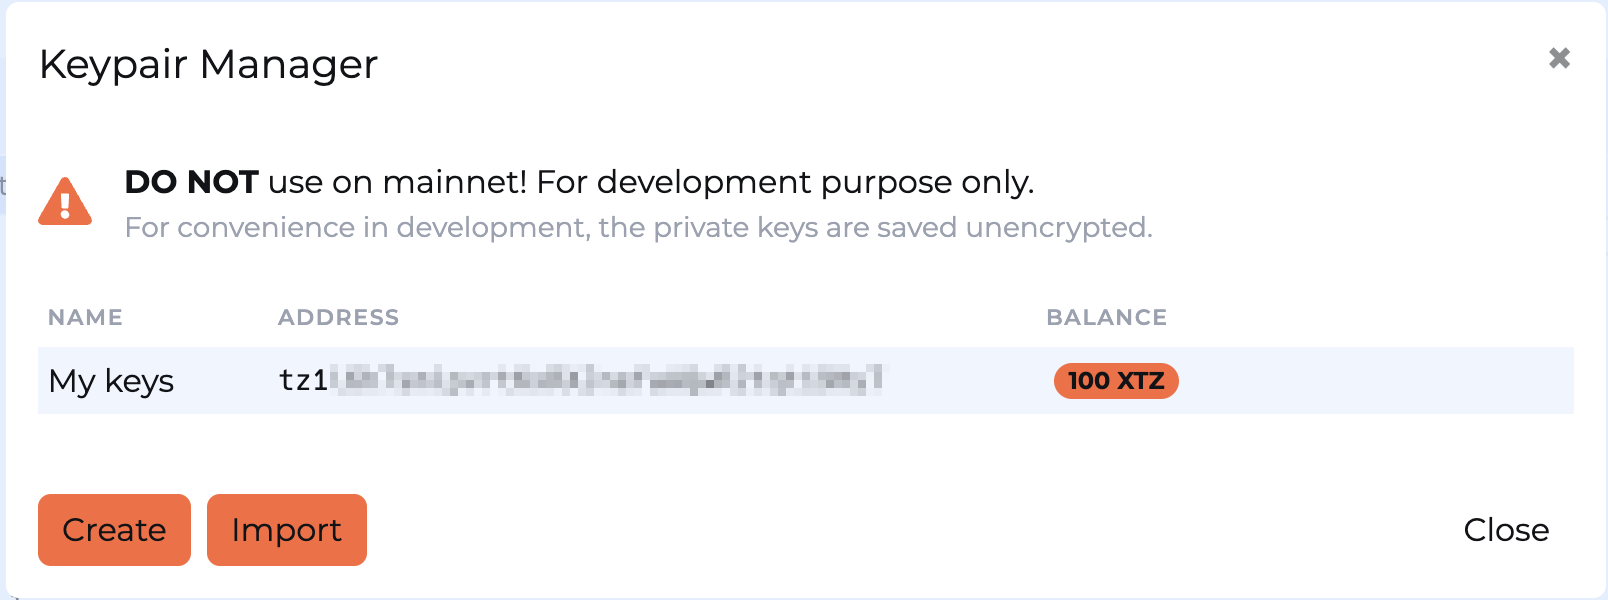
At the top right, click the Keypair Manager button. The "Keypair Manager" window opens.
-
Click Create.
-
Give the keypair a name such as "My keys" and click Create.
-
From the "Keypair Manager" window, copy the address of the new account, which begins with
kt1. You will need this address later. -
Click Close.
-
-
Send funds to the account from the testnet faucet:
-
Go to the Ghostnet faucet at https://faucet.ghostnet.teztnets.com/.
-
Put the new account address in the Or fund any address field.
-
Click the button to request 100 tokens and wait for the browser to complete the operation.
-
When you see a message that the tokens are sent to your address, go back to the web IDE, open the "Keypair Manager" window and verify that the account has tokens, as in this example:
-
-
In the IDE, Click the New button.
-
In the "Create a New Project" window, give your project a name, such as "NFT tutorial," select "Empty Project" in the Template field, and select "CameLIGO" in the Syntax field.
-
Click Create Project. The IDE opens a blank contract file and shows commands for the file on the left-hand side of the window.
-
Paste the contents of the
contract/NFTS_contract.mligofile into the editor. The IDE saves the file automatically. -
Remove the module name:
-
Click Project Settings.
-
Clear the Module name (optional) field.
-
Close the Project Settings window.
-
-
Click Compile and then in the "Compile" window, click Compile. The IDE compiles the contract code to Michelson, the base language that all Tezos contracts use. At the bottom of the window, it prints the message
wrote output to .workspaces/NFT tutorial/build/contracts/Contract.tz. If you see an error, make sure that you copied the entire contract file. -
Originate the contract:
-
Click Deploy.
-
In the "Deploy contract" window, in the Init storage field, paste the initial storage value for the contract, which you can get from the comment at the end of the contract:
{
  ledger = (Big_map.empty: (token_id, address) big_map);
  operators = (Big_map.empty: ((address * (address * token_id)), unit) big_map);
  reverse_ledger = (Big_map.empty: (address, token_id list) big_map);
  metadata = Big_map.literal [
  ("", Bytes.pack("tezos-storage:contents"));
  ("contents", ("7b2276657273696f6e223a2276312e302e30222c226e616d65223a2254555473222c22617574686f7273223a5b2240636c617564656261726465225d2c22696e7465726661636573223a5b22545a49502d303132222c22545a49502d303136225d7d": bytes))
  ];
  token_metadata = (Big_map.empty: (token_id, token_metadata) big_map);
  next_token_id = 0n;
  admin = ("tz1Me1MGhK7taay748h4gPnX2cXvbgL6xsYL": address);
} -
In the Signer field, make sure your new account is selected.
-
Leave the other fields blank and click Estimate. The IDE calculates the fees for the deployment.
-
Click Deploy and leave the window open to wait for the contract to be originate.
Originating the contract can take a few minutes. When the transaction completes, the window shows a message that the contract was deployed.
-
Copy the contract address, which starts with
KT1, and then close the "Deploy contract" window.
-
-
Verify that the contract is on the testnet by finding it on a block explorer:
-
Open a Tezos block explorer such as TzKT or Better Call Dev.
-
Set the explorer to Ghostnet instead of Mainnet.
-
Paste the contract address into the search field and press Enter.
-
Go to the Entrypoints tab to see the entrypoints and their parameters.
-
Now anyone can call the Tezos contract if they have tokens for the fees and send a valid request.
Run the backend application
The backend application is responsible for uploading the NFT data to IPFS. In these steps, you configure the backend application with your Pinata information:
-
In your command-line window, go to the
backendfolder of the tutorial application. -
Install its dependencies by running
npm install. -
In the
src/PinataKeys.tsfile, replaceDUMMY_KEYwith your Pinata API key and replaceDUMMY_SECRETwith your Pinata secret. -
Open the
src/index.tsfile.The
corsOptionsconstant in this file contains the location of the frontend application. It includes the default location of the frontend application (http://localhost:5173) and an example custom URL.const corsOptions = {
origin: ["http://localhost:5173", "https://my-cool-nft-app.com"],
optionsSuccessStatus: 200 // some legacy browsers (IE11, various SmartTVs) choke on 204
}; -
If you intend to host the frontend application anywhere other than on your computer, add its URL to the
corsOptionsconstant.If you are not going to change where the frontend application is hosted, you can leave this code unchanged.
-
Review the code for the
POST /mintendpoint.This endpoint is the only endpoint that the frontend application uses. First, it accesses the image file that the user uploads and uses the Pinata
pinFileToIFPSmethod to pin it to IPFS with a name and description:const readableStreamForFile = fs.createReadStream(`./uploads/${fileName}`);
const options: any = {
pinataMetadata: {
name: req.body.title.replace(/\s/g, "-"),
keyvalues: {
description: req.body.description
}
}
};
const pinnedFile = await pinata.pinFileToIPFS(
readableStreamForFile,
options
);The app must pin the picture first because the token metadata includes a hash of the picture.
Then, it creates a metadata object with information about the NFT, including its name and description and the IPFS URI of the image and pins that metadata object to IPFS:
if (pinnedFile.IpfsHash && pinnedFile.PinSize > 0) {
  // remove file from server
  fs.unlinkSync(`./uploads/${fileName}`);
  // pins metadata
  const metadata = {
    name: req.body.title,
    description: req.body.description,
    symbol: "TUT",
    artifactUri: `ipfs://${pinnedFile.IpfsHash}`,
    displayUri: `ipfs://${pinnedFile.IpfsHash}`,
    creators: [req.body.creator],
    decimals: 0,
    thumbnailUri: "https://tezostaquito.io/img/favicon.png",
    is_transferable: true,
    shouldPreferSymbol: false
  };

  const pinnedMetadata = await pinata.pinJSONToIPFS(metadata, {
    pinataMetadata: {
      name: "TUT-metadata"
    }
  });
  // ...
}
This metadata object includes several standard fields for Tezos tokens, including a name, description, symbol to show in wallets, and URIs to preview pictures and thumbnails. The
decimalsfield is set to 0 because there is only one of each NFT.If both of the pins were successful, the endpoint returns the IPFS URIs of the image and metadata to the frontend application:
if (pinnedMetadata.IpfsHash && pinnedMetadata.PinSize > 0) {
  res.status(200).json({
    status: true,
    msg: {
      imageHash: pinnedFile.IpfsHash,
      metadataHash: pinnedMetadata.IpfsHash
    }
  });
} else {
  res
    .status(500)
    .json({ status: false, msg: "metadata were not pinned" });
} -
Start the backend application by running
npm run dev.
Run the frontend application
The frontend application accepts information about a new NFT from the user, sends the image and metadata to the backend, and calls the smart contract to mint the NFT. Follow these steps to configure and start the frontend application:
-
In your command-line window, go to the
frontendfolder of the tutorial application. -
Install its dependencies by running
npm install. -
Open the
src/App.sveltefile. -
Set the
contractAddressconstant to the address of the originated smart contract, which starts withKT1:const contractAddress = "KT1XdU2tK5hoDhtToP4kSSR9HiCkie4mZqFp"; -
Review the code for the
onMountfunction:This function runs when the page loads. It starts by creating an instance of the Taquito
TezosToolkitobject, which provides access to Tezos. It also creates an object to unpack data from the map properties in the contract's storage:Tezos = new TezosToolkit(rpcUrl);
Tezos.setPackerProvider(new MichelCodecPacker());It creates an instance of the Beacon
BeaconWalletobject to prepare to connect to the user's wallet, but it does not connect to the user's wallet immediately. It could try to connect to the user's wallet immediately, but it's better programming practice to wait and let the user click a button to connect their wallet after the page loads.wallet = new BeaconWallet(walletOptions);The application can remember if it has a connection to a wallet, so if the user has connected their wallet before, it connects to that wallet automatically:
if (await wallet.client.getActiveAccount()) {
  userAddress = await wallet.getPKH();
  Tezos.setWalletProvider(wallet);
  await getUserNfts(userAddress);
} -
Review the code for the
connectfunction.First, this function uses the Beacon wallet SDK to prompt the user to connect their wallet if it is not already connected:
if (!wallet) {
  wallet = new BeaconWallet(walletOptions);
}
Then, it requests permission from the user:
await wallet.requestPermissions();Finally, it retrieves the user's current NFTs with the
getUserNftsfunction:await getUserNfts(userAddress); -
Review the code for the
getUserNftsfunction:This function receives the user's account address. Then, it retrieves the current storage for the smart contract, including information about which account owns each NFT:
const getUserNfts = async (address: string) => {
  // finds user's NFTs
  const contract = await Tezos.wallet.at(contractAddress);
  nftStorage = await contract.storage();
  const getTokenIds = await nftStorage.reverse_ledger.get(address);
  // ...
}
The
reverse_ledgerproperty in the contract storage keeps a list of who owns each NFT. However, this property is not a standard feature of NFT smart contracts. According to the standard, the contract must have aledgerproperty that maps the ID of each token to the address that owns it. Thereverse_ledgerproperty indexes this information in the opposite way, so the code can filter the list of tokens according to a given owner's address. This property is for the convenience of apps accessing the storage and may not be available on other NFT contracts.Now that it has the list of IDs of NFTs that the account owns, it retrieves the metadata for each token from the contract storage:
if (getTokenIds) {
  userNfts = await Promise.all([
    ...getTokenIds.map(async id => {
      const tokenId = id.toNumber();
      const metadata = await nftStorage.token_metadata.get(tokenId);
      const tokenInfoBytes = metadata.token_info.get("");
      const tokenInfo = bytes2Char(tokenInfoBytes);
      return {
        tokenId,
        ipfsHash:
          tokenInfo.slice(0, 7) === "ipfs://" ? tokenInfo.slice(7) : null
      };
    })
  ]);
}
The frontend uses this
userNftsvariable to show the user's NFTs on the page. -
Review the
uploadfunction:This function starts by creating an HTML form data object with the image, title, and description for the NFT and the address of the creator, who will own the new NFT. It sends this data to the backend's
POST /mintendpoint:const data = new FormData();
data.append("image", files[0]);
data.append("title", title);
data.append("description", description);
data.append("creator", userAddress);
const response = await fetch(`${serverUrl}/mint`, {
method: "POST",
headers: {
"Access-Control-Allow-Origin": "*"
},
body: data
});It receives the response from the backend with the URIs for the NFT metadata. Then, it creates a Taquito
ContractAbstractionobject to represent the smart contract and provide access to the contract's methods and storage:const contract = await Tezos.wallet.at(contractAddress);It uses this object to call the contract's
mintentrypoint and pass the metadata and wallet address:const contract = await Tezos.wallet.at(contractAddress);
const op = await contract.methods
.mint(char2Bytes("ipfs://" + data.msg.metadataHash), userAddress)
.send();
console.log("Op hash:", op.opHash);
await op.confirmation();Finally, it refreshes the list of the user's NFTs with the
getUserNftsfunction:await getUserNfts(userAddress); -
Start the frontend application by running
npm run dev.
Testing the application
To test the application, you must have a Tezos wallet and a small amount of XTZ tokens to pay the transaction fees.
-
Install any wallet that is compatible with Tezos, such as Temple wallet and switch to the Ghostnet network.
-
Send funds to the wallet from the testnet faucet:
-
Go to the Ghostnet faucet at https://faucet.ghostnet.teztnets.com/.
-
Put the wallet account address in the Or fund any address field.
-
Click the button to request 5 tez and wait for the browser to complete the operation.
-
When you see a message that the tokens are sent to your address, open your wallet and verify that the tokens are there. It can take a few minutes for them to appear.
-
-
When the frontend application starts, open the web browser to http://localhost:5173/.
-
Click Connect your wallet and approve the connection in your wallet.
-
Click Choose file and select any image for the NFT.
-
Add a title and description for the new NFT in the Title and Description fields.
-
Click Mint NFT.
-
Confirm the transaction in your wallet, which requires a small amount of XTZ for the transaction fees.
-
Wait for the transaction to complete. When it completes, the screen changes to a success message with links to the NFT information, as in this picture:
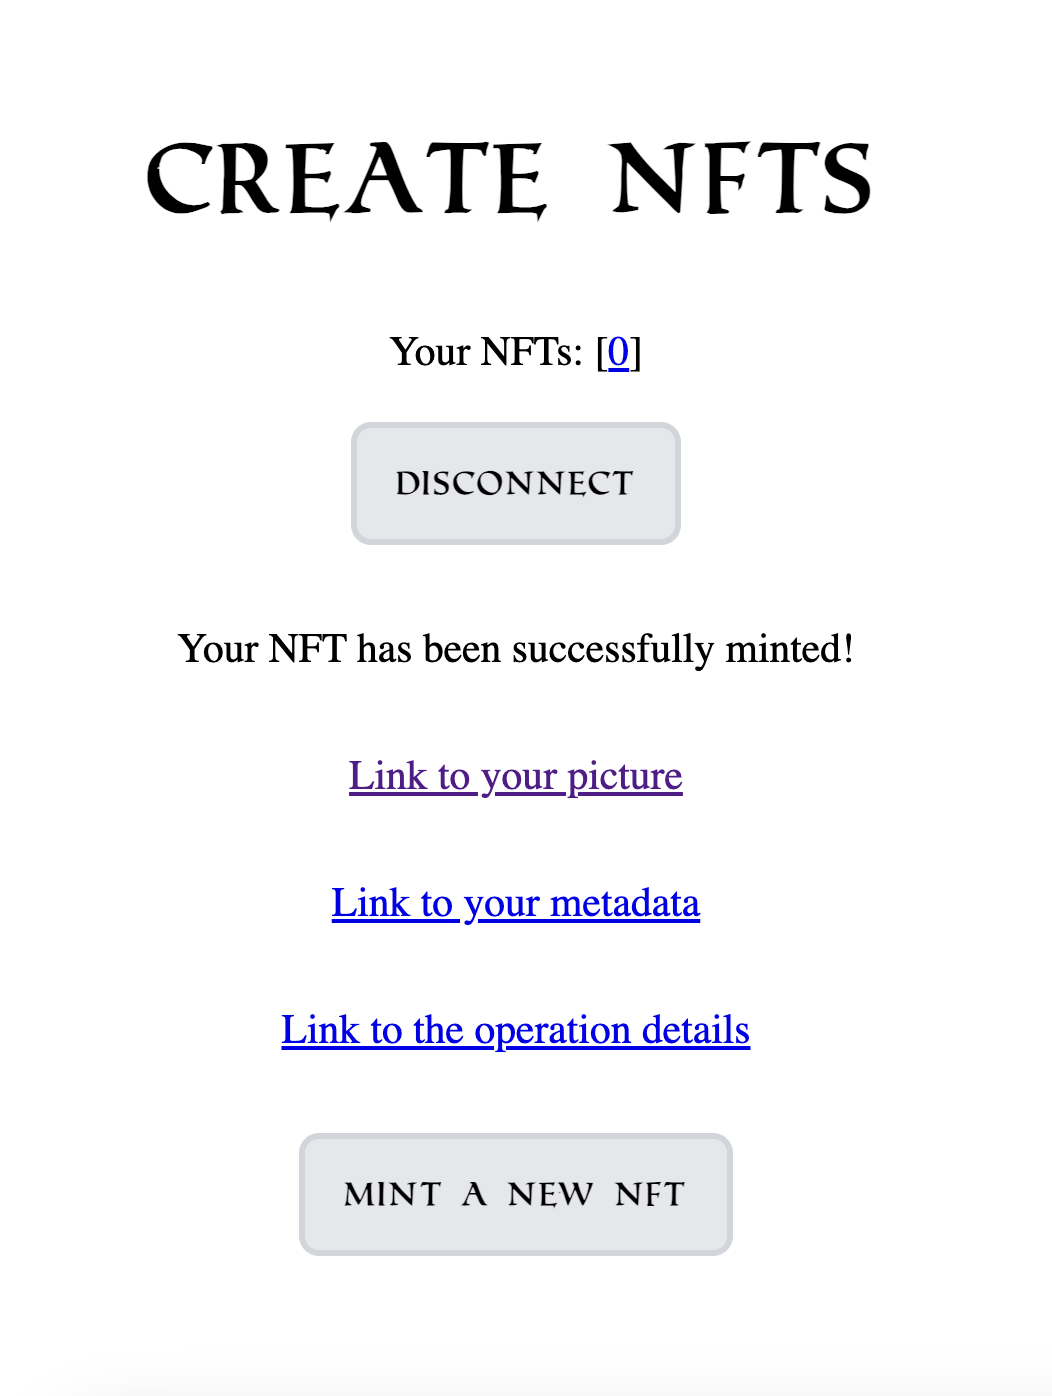
In the "Your NFTs" list, you can click on a number (starting at 0) to see the information that is in the NFT, which includes the name and description that you added and links to data on IPFS. The page also shows a link to a block explorer where you can see technical information about the minting transaction.
To see information about the smart contract and NFT collection, go to a block explorer such as https://tzkt.io/, set it to Ghostnet, and enter the address of the smart contract. The explorer shows information such a list of the tokens in the collection and who owns them. You can also see the current state of the storage for the contract.
Summary
In this tutorial, you learned how to create an application that mints applications on Tezos on behalf of users. The parts are independent, so you could code a different frontend application to call the smart contract or use a different backend application to upload the NFT metadata.
If you want to continue working with this application, try implementing the burn entrypoint in the frontend to allow users to destroy their NFTs.
The contract has a burn entrypoint, but the frontend does not provide a way to call it.
You can try adding your own entrypoints and originating a new contract, but you cannot update the existing contract after it is originated.
You can add a fee to mint NFTs by sending funds along with the mint transaction. If you add the fee as in the following code, the transaction takes the fee amount along with the transaction fee from the user's wallet. Currently, the contract does not have a way to send this fee to any other account, so the fee is locked in the contract forever. You can add an entrypoint to the contract that allows authorized users to withdraw the fee later.
const op = await contract.methods
  .mint(char2Bytes("ipfs://" + data.msg.metadataHash), userAddress)
  .send({ amount: 1 });
You can also optimize the application by generating the IPFS hashes on the client side before pinning them. If the mint transaction fails, it may leave unused metadata in your IPFS account. To avoid this problem, you can start an IPFS node in the browser, pin the metadata there, mint the NFT, and pin the metadata to your Pinata account only if the mint transaction succeeds.
If you want to continue working with NFTs in a more complex way, try creating a marketplace for tokens as described in the tutorial Build an NFT Marketplace.